AWS Redshift
☀️ Ask your Data Engineering team to help you with this
Step 1: Create Access to your Redshift Cluster
Make sure that your Redshift cluster is running and that an administrator can connect to it in a SQL shell.
Refer to this document for details: Connecting to an Amazon Redshift cluster using SQL client tools
Step 2: Create a Role for Sundial
Next, you’ll need to create a user for Sundial within Redshift. Use the information below, and refer to this AWS document for details: Create User
CREATE USER sundial PASSWORD 'chooseapassword';Grant sundial access to the tables it should analyze. sundial will have access to tables in the public schema. If there’s another table in a restricted schema, say restricted, then grant sundial privileges to access the table.
GRANT USAGE ON SCHEMA restricted TO sundial;

GRANT SELECT ON TABLE restricted.orders TO sundial;
Refreshed Tables
If you have a process that refreshes your tables (like Looker PDTs do), then additional steps may be necessary to configure your connection. Please contact the Sundial team for assistance on this.
Limited Write Permissions (Optional)
Below is the straightforward way to create a scratch space schema and give sundial permissions to create, delete and query tables.
CREATE SCHEMA sundial_scratch_schema;

GRANT ALL ON sundial_scratch_schema TO sundial;
To give permissions on a completely different database than the main client read-only tables.
CREATE DATABASE sundial_scratch_db;

GRANT ALL ON DATABASE sundial_scratch_db TO sundial;
We are asking all privileges to the scratch space DB / SCHEMA as its a clean space just for Sundial to work with.
Ensure Sundial can access your table using a SQL shell.
SELECT * FROM some_public_table LIMIT 1;

SELECT * FROM restricted.some_table LIMIT 1;
Step 3: Grant Sundial access
In the previous step, a database user was created which Sundial can use. In this step, we’ll allow the database user to be outside of your AWS Account.
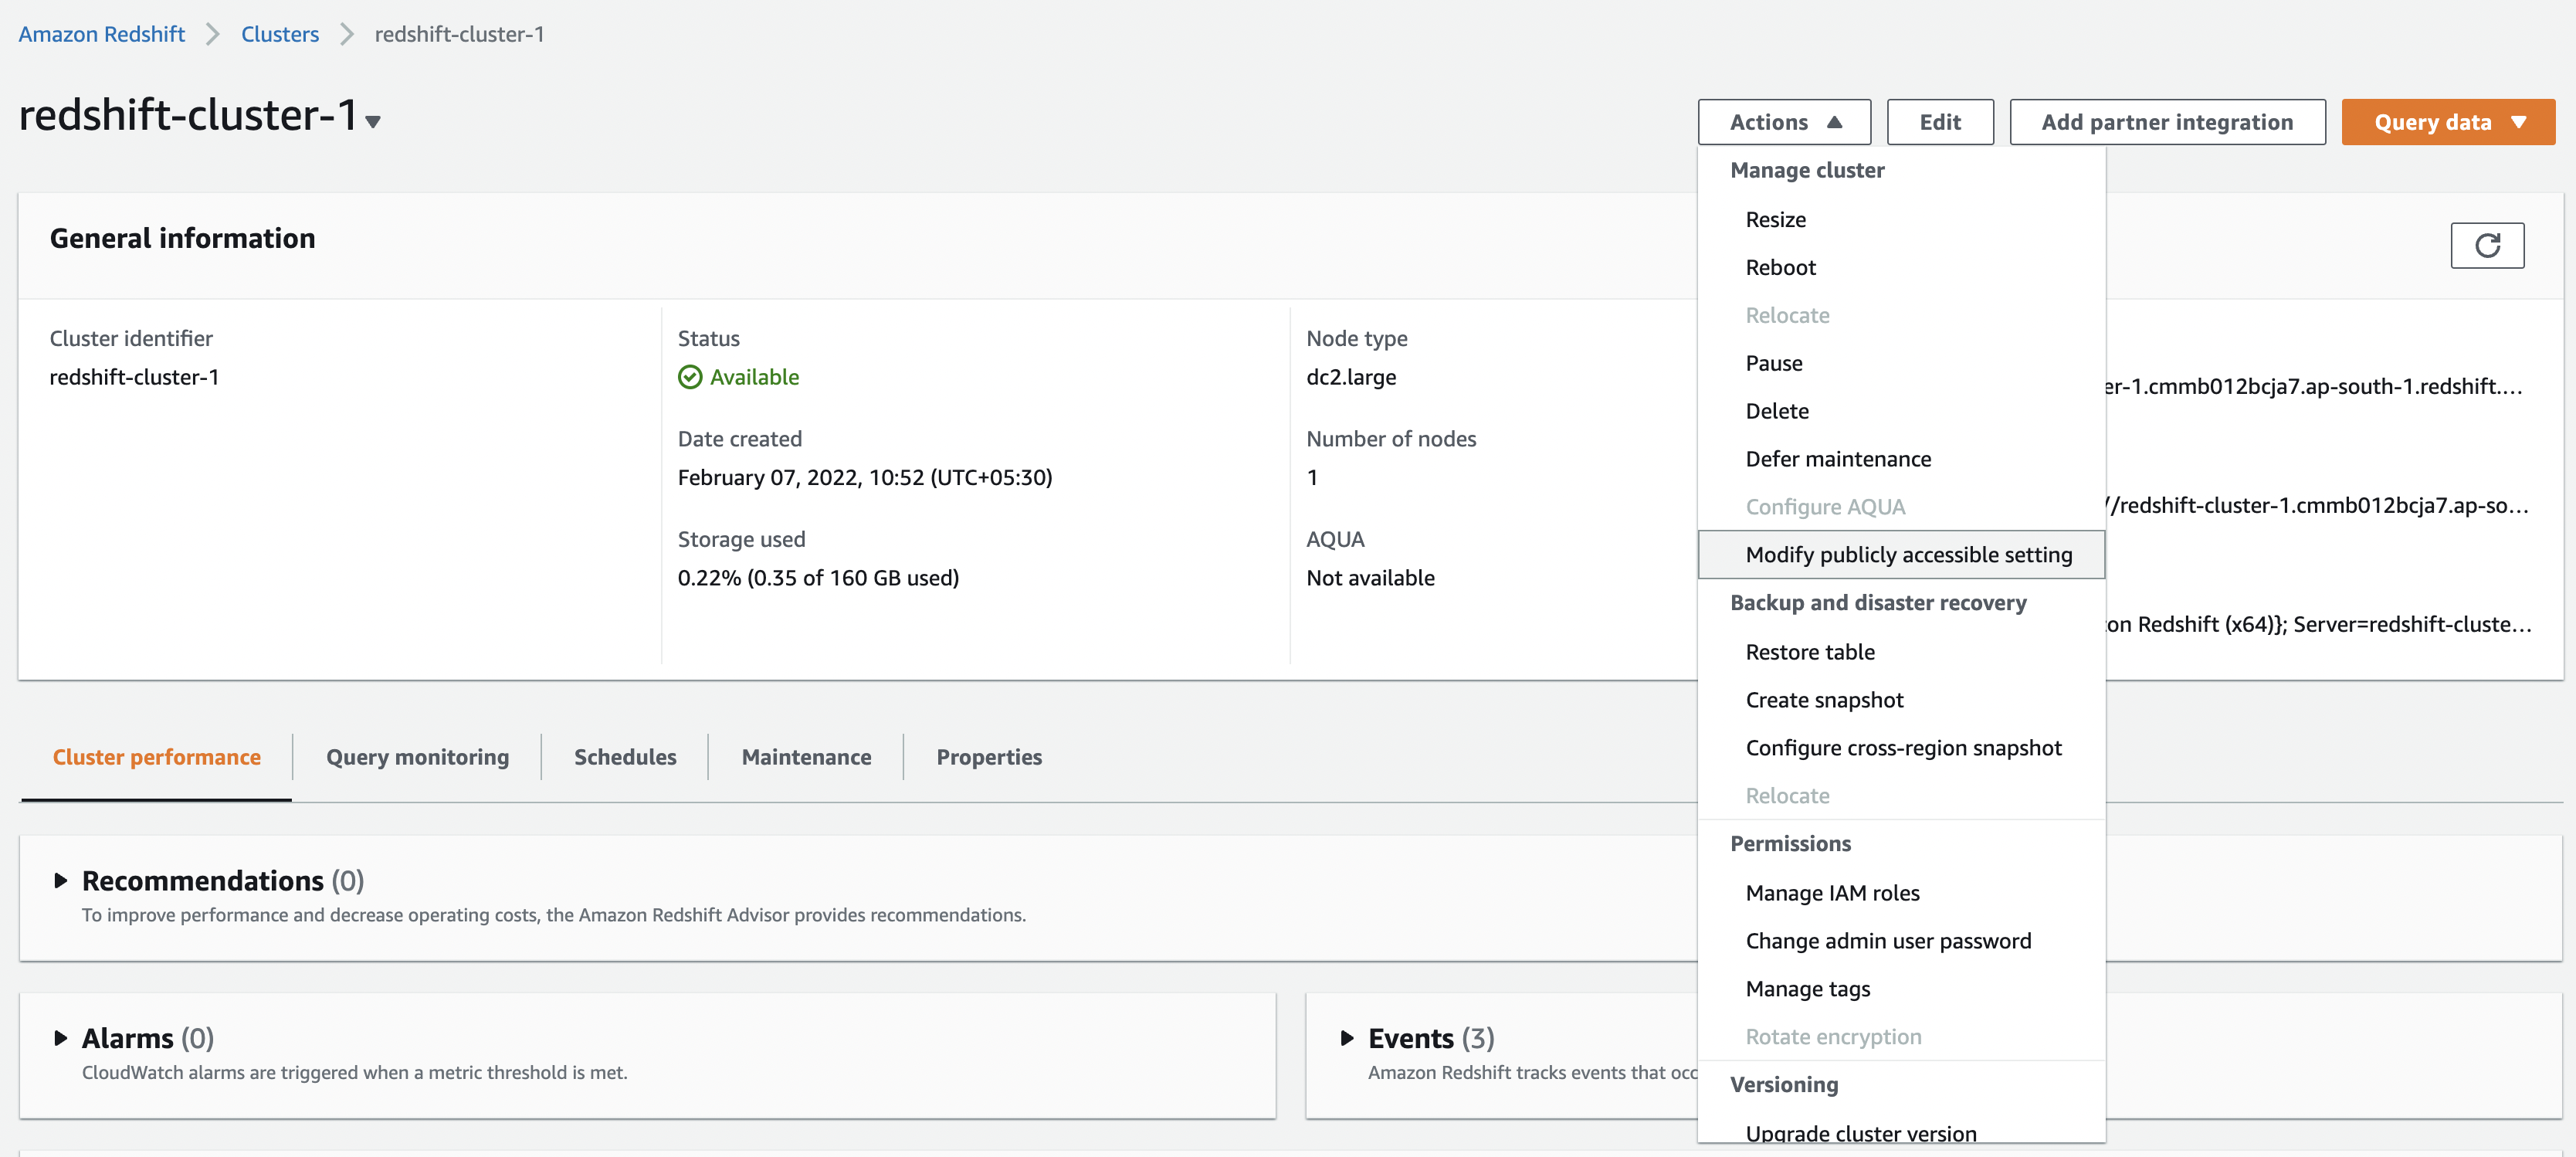
Step 3A: Publicly Accessible Setting
In the setup page for each cluster which you want Sundial to access, click on “Modify publicly accessible setting” and Enable it.
Step 3B: Allow Inbound Requests
-
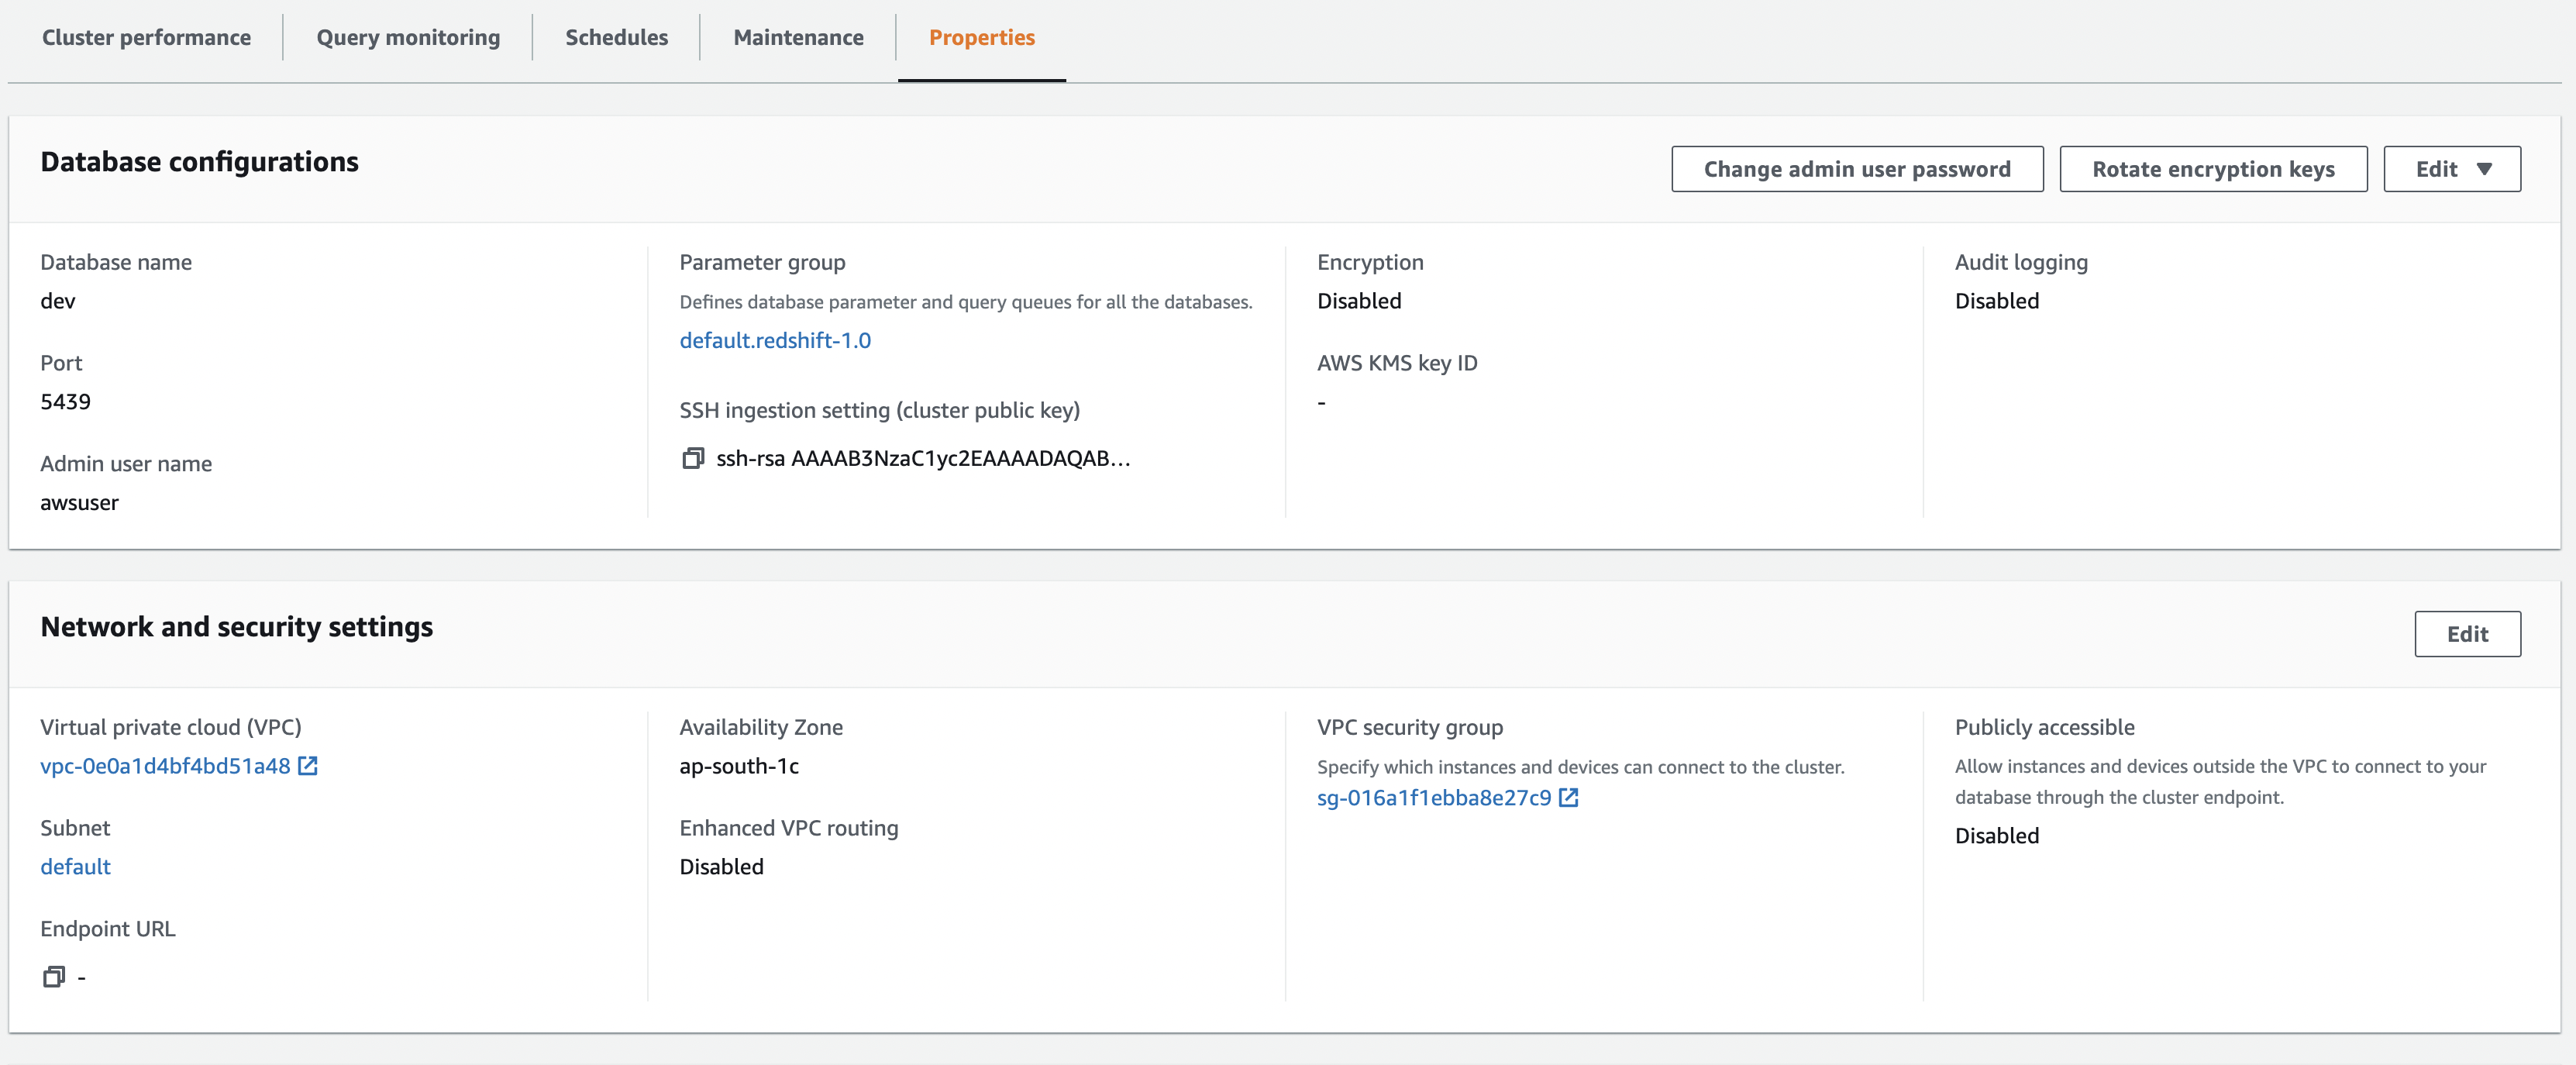
Go to Properties within a Cluster
-
Click the Security Group
-
Click the Security Group Id which is applied to this cluster

-
Edit Inbound Rules
-
Add Rule: Type is
All TCP. Source isAnywhere-IPv4
Got questions? Write to the email address at the bottom of this document!
Step 4: Gather and Share Your Cluster Information
- From your AWS console, enter "Redshift"
- Click on Clusters on the left hand side
- Click the cluster name to view your cluster information
At the top of this screen you will notice the endpoint that will look something like this:
cluster.XXXXXXXX.us-west-2.redshift.amazonaws.com
The characters before the colon is the Host Name you will provide in Sundial. Everything after the colon is the Port number.
What to share with Sundial
| Field | Description |
|---|---|
| Port | e.g. 5439 |
| Host Name/URL | from the AWS endpoint |
| Database Name | e.g. dev, analytics |
| Schema | e.g. sundial_export |
| Username | Redshift user’s username from Step 2 (e.g., sundial) |
| Password | The Sundial Redshift user’s password from Step 2 |
| Data Source Name (Optional) | The name that will display in the list of data sources in Sundial |
| Restricted Access (Optional) | Let us know any tables which have restricted access or similar |
Fill in these details directly in the connector creation form if enabled. Otherwise, share them with Sundial via a secure vault or secrets store.
Still have questions?