Sources
A Source is a table-based representation of raw data from an external system. It serves as the entry point for data into your Sundial transformation pipeline — before any cleaning, joining, or enrichment happens. Every Source is backed by a Connector, which provides the credentials and connection details for the external system.
Sources can represent:
- Tables or views in a data warehouse (Snowflake, BigQuery, Redshift)
- Structured files in a data lake (Iceberg or Delta Lake on S3 or GCS)
- Partitioned CSV, JSON, or Parquet files in object storage
What a Source contains
Each Source table has:
- Connection configuration — The connector-specific details that identify the table, such as the source table name in the connection's database or the prefix path on an object storage bucket.
- Schema — The expected column names and data types that will be usable within Sundial. You can select a subset of columns from the source table so that only those are visible and queryable.
- Table tests — Optional data quality tests that validate the source data whenever it is refreshed. See Pipeline Operations for details.
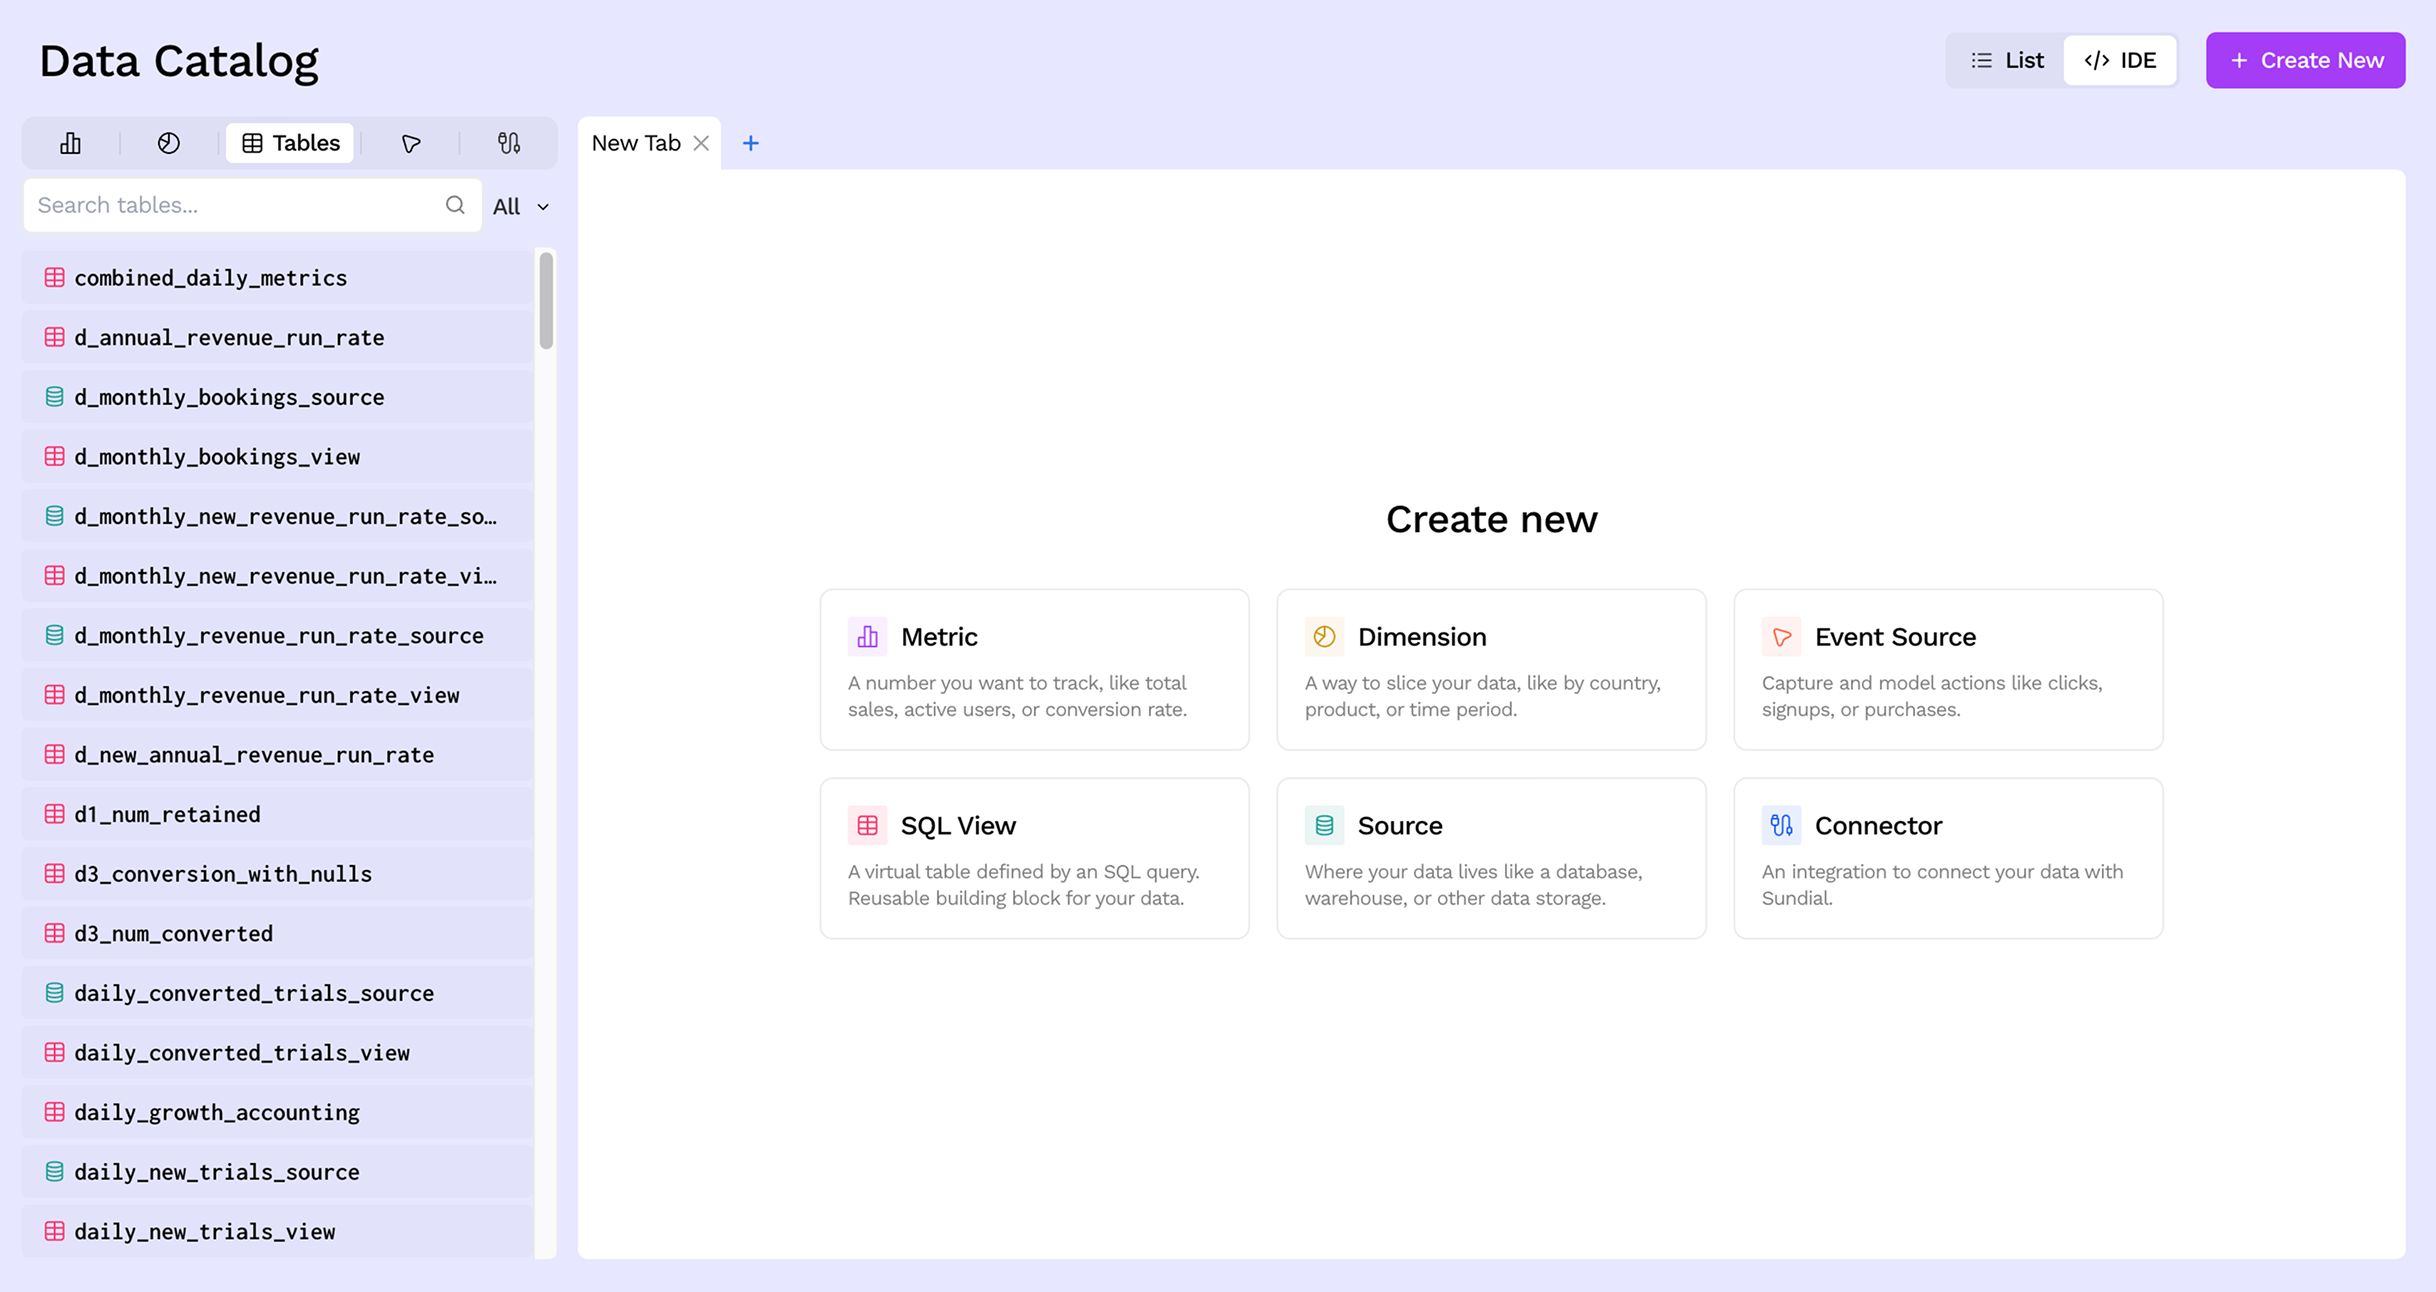
Creating a Source
Step 1: Open the Create New menu
From the Data Catalog, click the + Create New button in the top-right corner. In the menu that opens, select Source.
Step 2: Name and describe the source
Give your source a descriptive name. Table names can only contain alphanumeric characters and underscores, and cannot start with a number (e.g. raw_orders, stripe_payments). Optionally add a description to help teammates understand what this source represents.
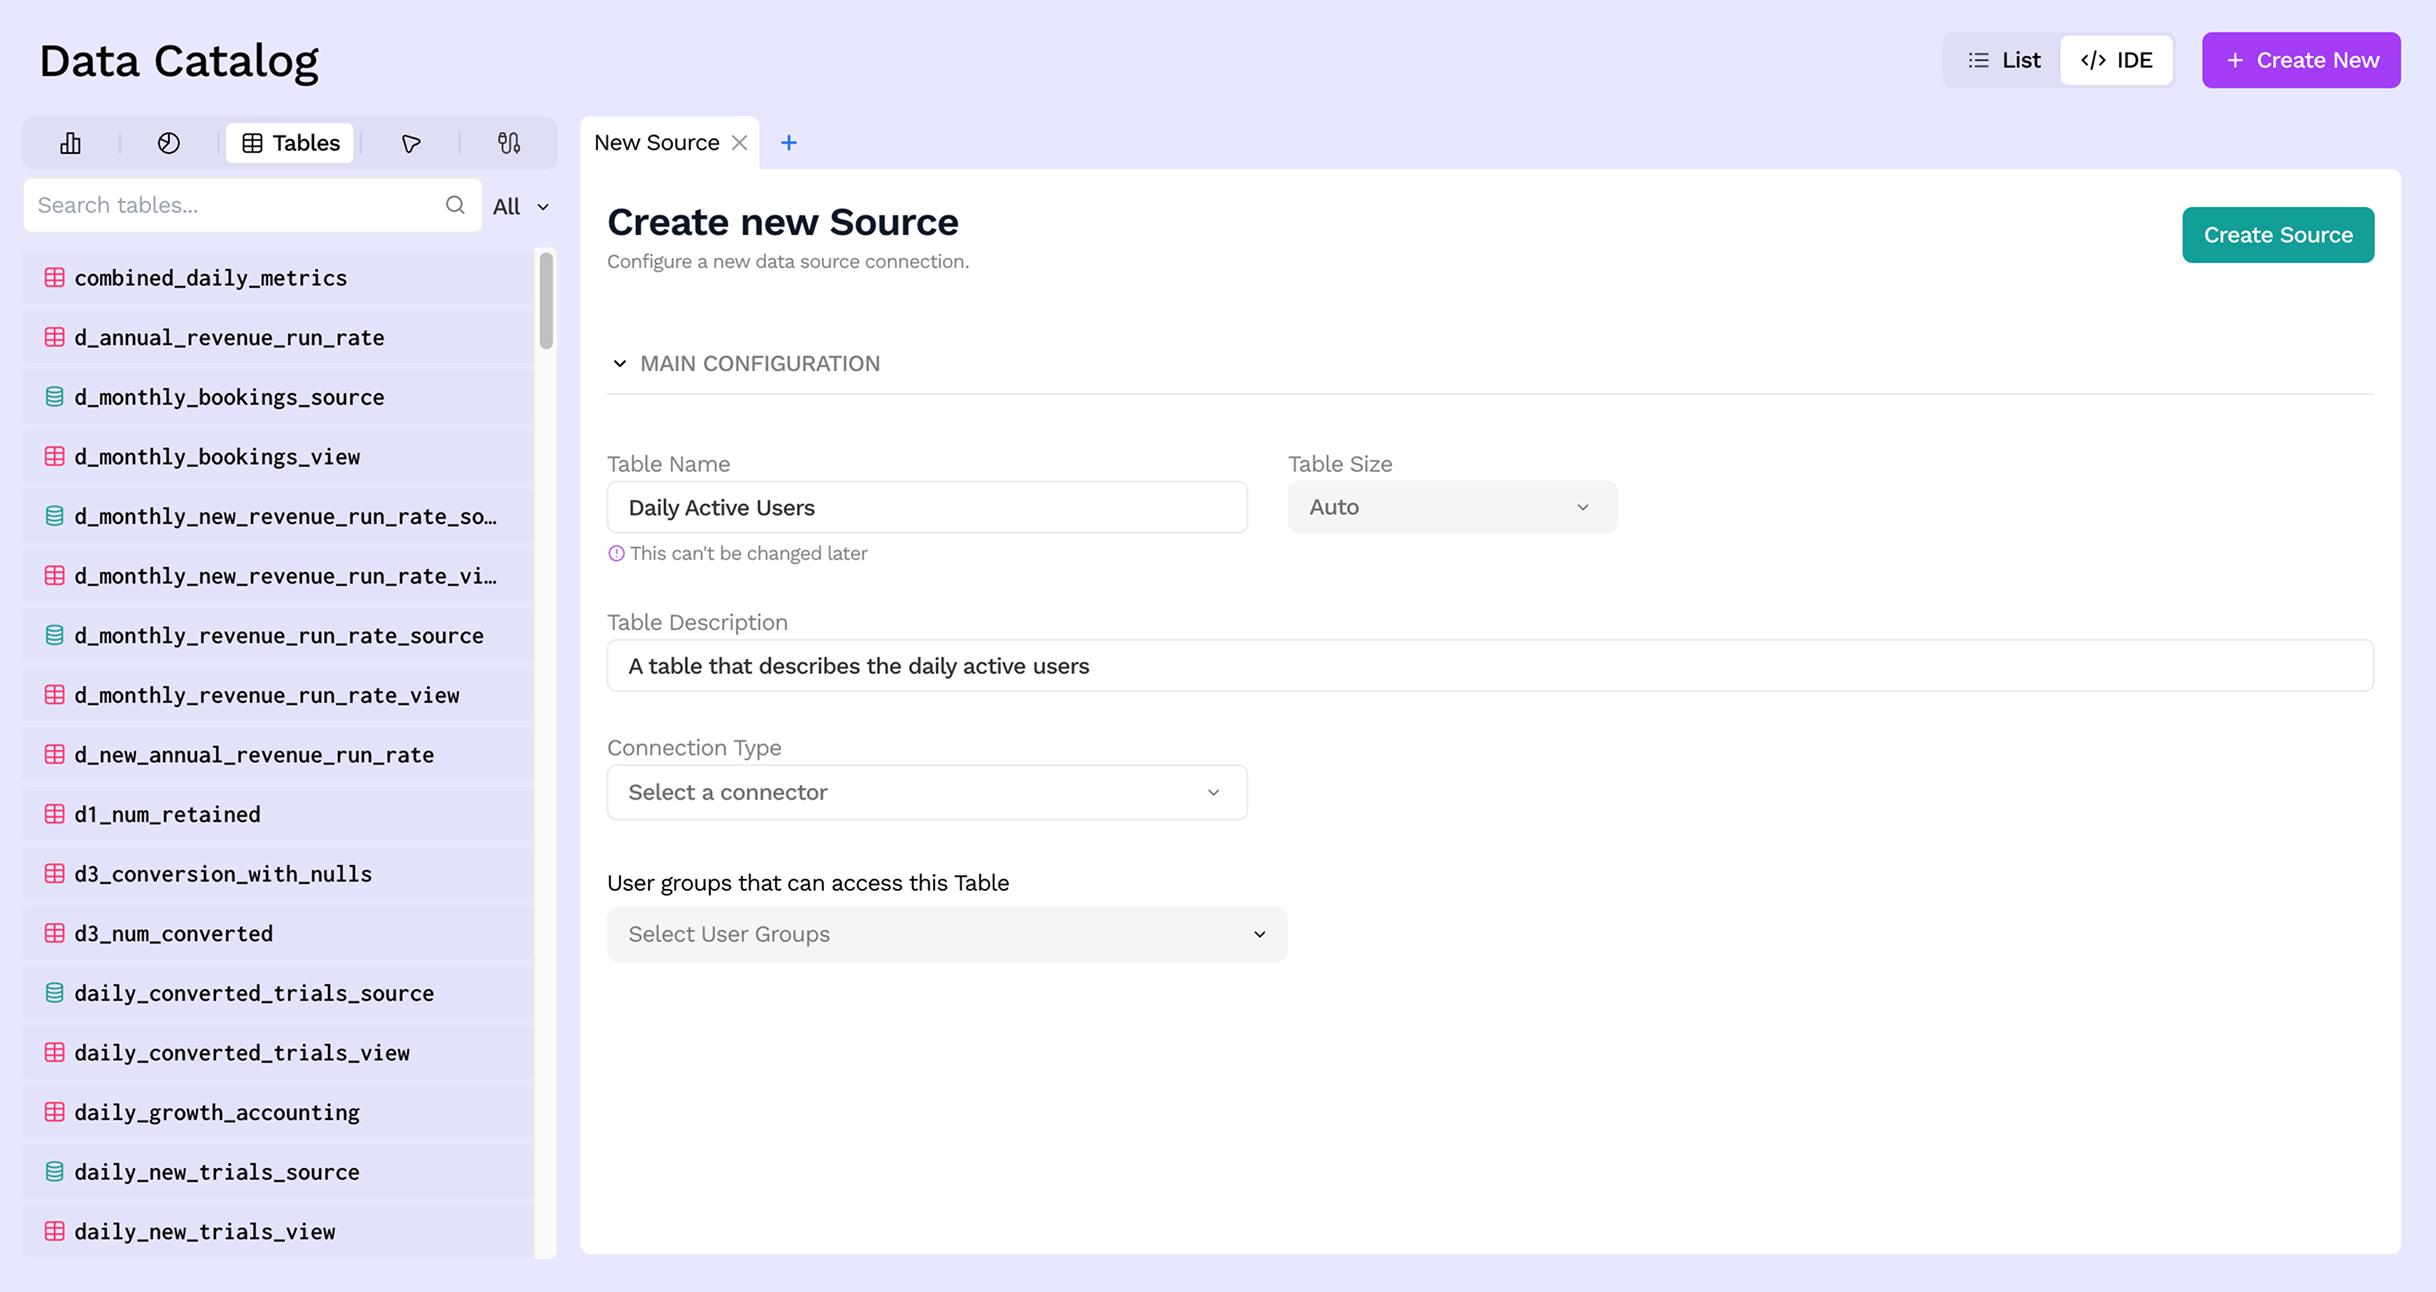
Step 3: Select a Connector
Choose the Connector that provides access to your external data. Only connectors that have already been set up will appear here. If you need to add a new one first, see Connecting your data.

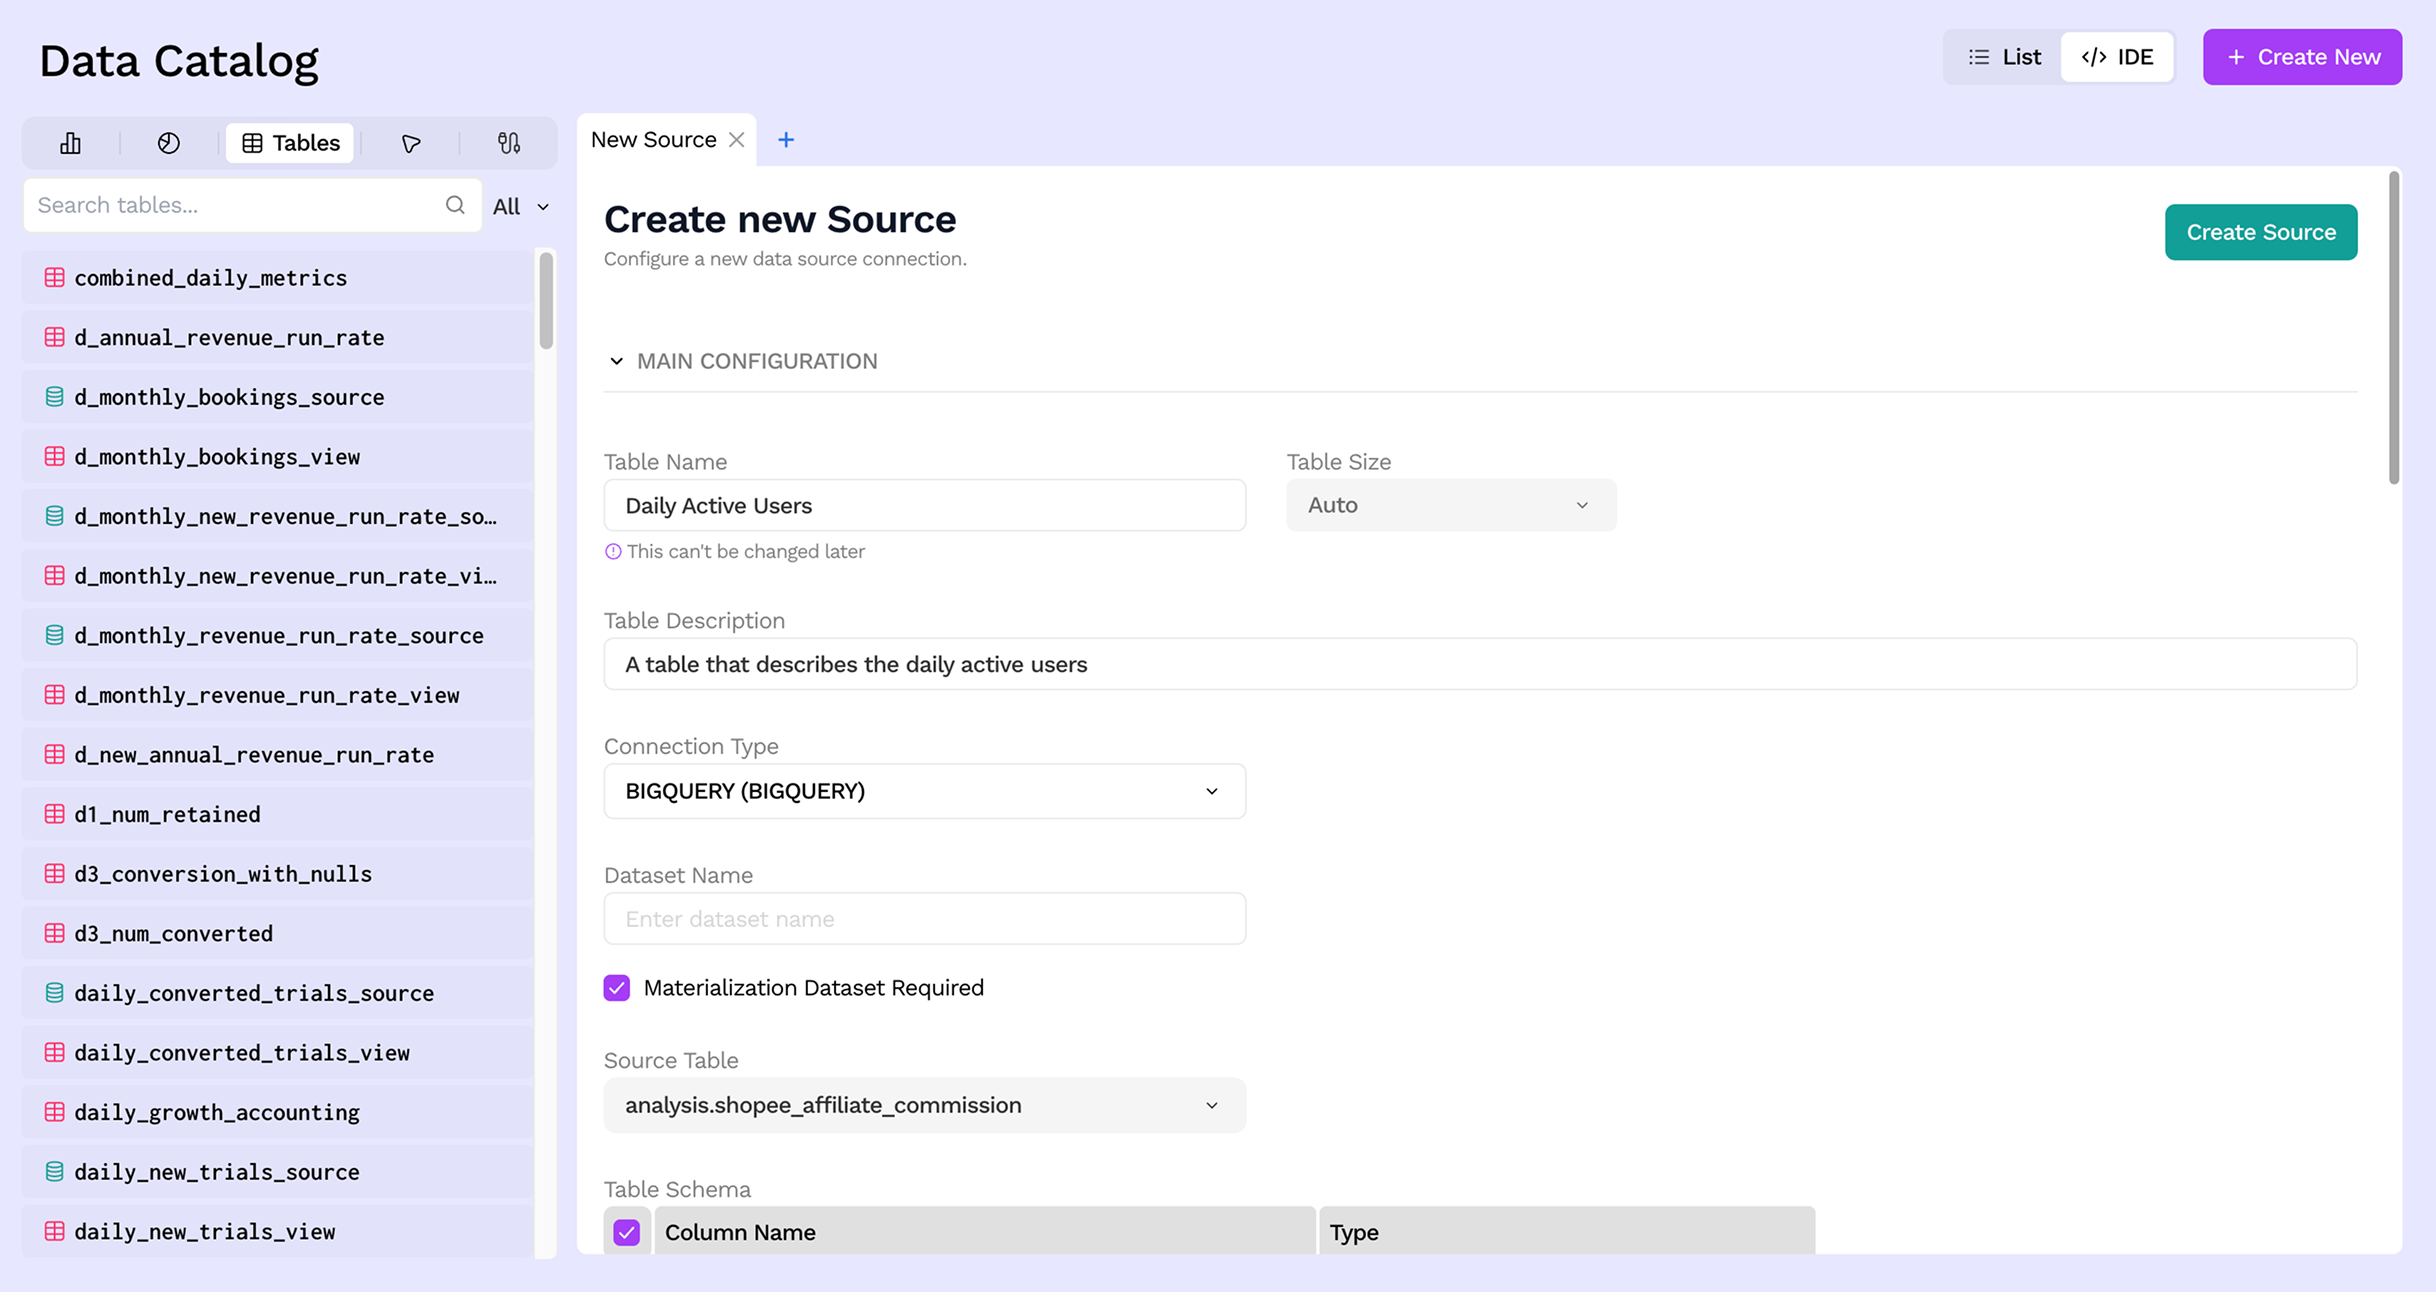
Step 4: Pick a table
Once a connector is selected, Sundial lists the available tables from that source system. Select the one you want to bring in. For object-storage connectors (S3, GCS), you will provide a file path, extension, and optional partition configuration instead.
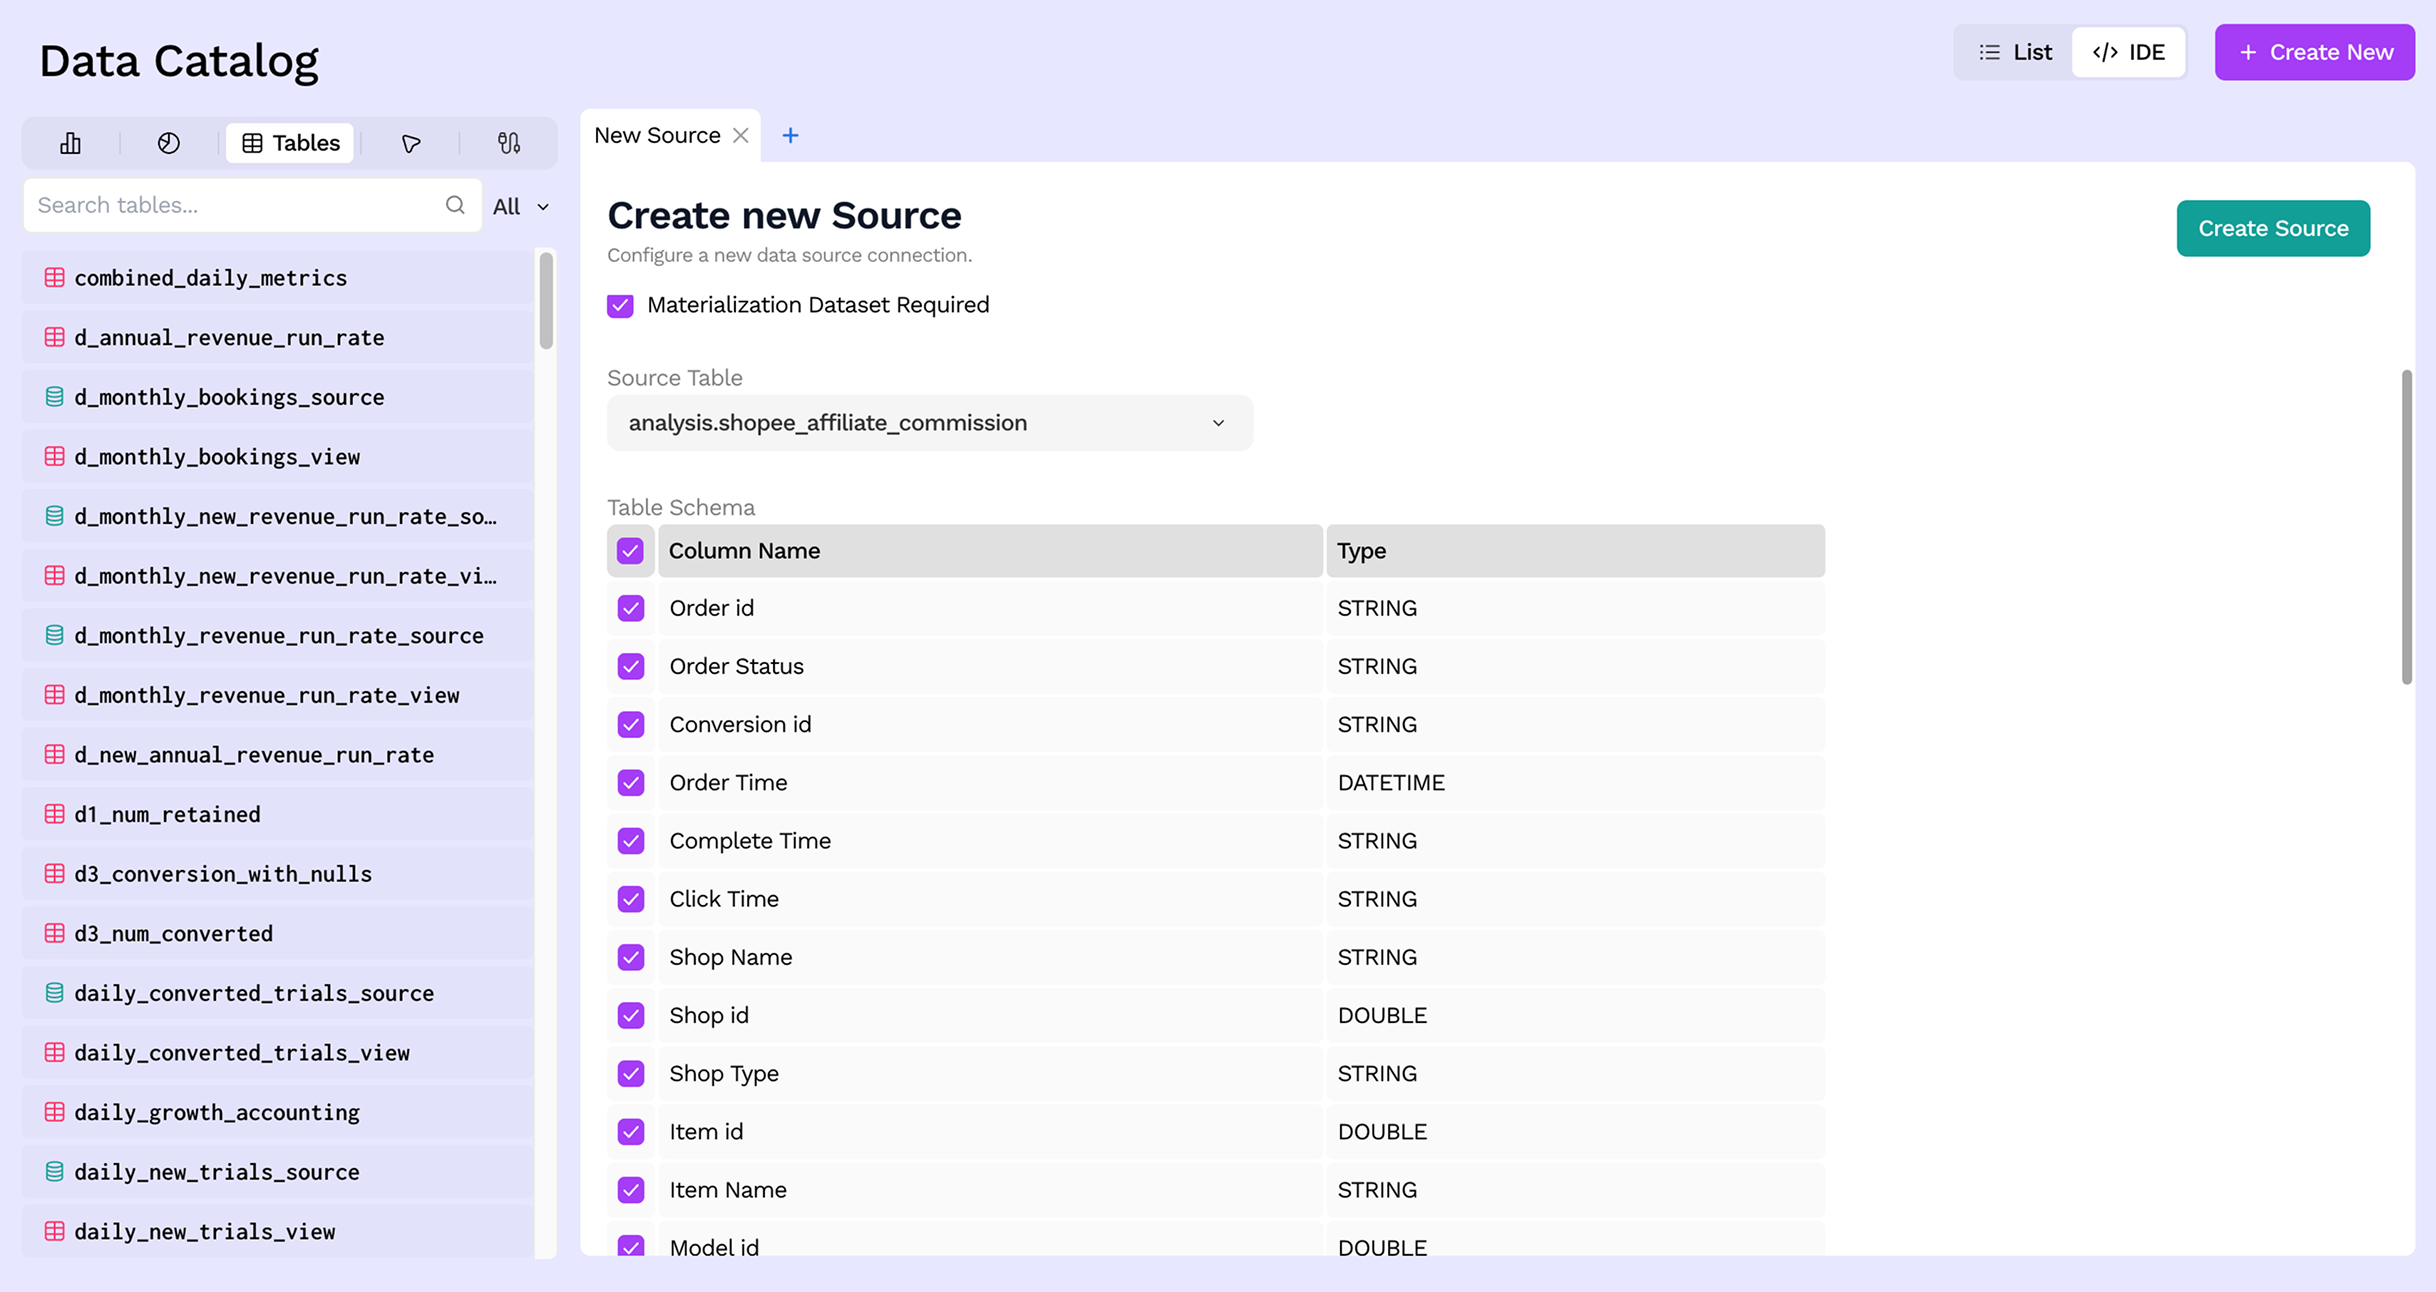
Step 5: Choose columns
By default all columns from the source table are included. You can deselect columns you do not need — only the selected columns will be visible and queryable within Sundial.
Step 6: Save
Click Save to register the source. Sundial will sync the schema and the source will appear in the Data Catalog, ready to be referenced by SQL Views and other downstream models.
Next steps
- Write transformations on top of your source using SQL Views
- Add data quality tests to validate incoming data